In math, I'm trying to help my students with understanding number concepts. They understand whole numbers, but struggle with negative numbers, fractions, and decimals. I found an activity online and "tweeked" it.
I have been using this "Number Detectives" as a warm-up activity each day. I give each set of partners a sheet with a number already written in. For example, I will write in "0.41" or "-0.41" or "34.3%". Then, with a partner, the students have to find different ways to prove that number. It's been a great way for them to visualize the number, as well as prove what the number means.
Thursday, November 8, 2012
Wednesday, October 10, 2012
My students are becoming a Tweeter!
Follow my class on Twitter! @kielclassroom
My purpose in trying Twitter was for a few reasons. First, I wanted to introduce students to Twitter and have them practice participating in a controlled social media account. Additionally, I felt Twitter was a great way to teach main idea and summarizing (they can only have 140 characters) and a good communication tool between our classroom and the world!

What did I do to set this up?
My purpose in trying Twitter was for a few reasons. First, I wanted to introduce students to Twitter and have them practice participating in a controlled social media account. Additionally, I felt Twitter was a great way to teach main idea and summarizing (they can only have 140 characters) and a good communication tool between our classroom and the world!
What did I do to set this up?
- Create a free Twitter account for your class. I used @kielclassroom for mine.
- Show your class the YouTube video, "Twitter in Plain English".
- Go through the PowerPoint, "What is Twitter?" During this, we talked a lot about safety (once you post, it's permanently there) and who our audience will be.
- Then, we logged into our account. I showed them how to log-in, how to read other's tweets, and how to compose a professional tweet (they must end each tweet with their first name only).
- We went through the directions sheet and the class calendar. I also put 2 students in charge of posting the names on the board of who will be in charge of tweeting that day.
- Then, we did a sample tweet together, as well as found people/organizations we wanted to follow (we made a rule that students needed to ask the class before following someone, since this is our class account).
Monday, October 8, 2012
"My favorites" from Small Group Reading
Each day, my students participate in 60 minutes of a small group/independent work time for our literacy block (after our 30 minute shared reading). During this time, they use 30 minutes of the time working independently on a reading strategy/skill and the other 30 minutes meeting with an adult (in a book based on need/level).
Today, I'm sharing some of my favorite graphic organizers/forms that I use during small group time. Most of these forms were "stolen" and "tweeked" from another person, so I can't take the credit. Additionally, most of these forms/graphic organizers I use throughout the duration of the entire book (students get a new sheet everyday). I do this so students can practice and master the concept being taught in the graphic organizer.

Use if you'd like!
Fiction Tracking your Comprehension- This form requires students to keep track of their comprehension while reading, pose questions for their group, as well as summarize their reading. When students participate in the discussion, they add notes to their sheet in a new color, as well as highlight any questions or ideas that another person brought up. I like to do this so it makes students realize they should gain information from a discussion (and from other people's viewpoints). See picture for an example
Notes and Thinking Graphic Organizer- This graphic organizer is great for making kids think. This requires them to find the notes (nonfiction or fiction) and have some type of thinking from it.
Questioning and Summarizing- I got this graphic organizer from a friend a few years ago. This allows students to seperate their questions into before, during, and after reading. After we share our questions in group, I usually try to get students to notice how their questions change throughout the reading process.
Quick Summary Bookmark- I usually cut these out and have students use them for bookmarks. This is a nice way to teach kids to pull out the main idea, while it also allows them to review last night's reading in a quick way.
Reciprocal Teaching Bookmark & Reciprocal Teaching Recording Sheet- A couple of years ago, I was introduced to the Reciprocal Teaching process for struggling readers (I have since started using with higher ability students also). There is a lot of research to support that this, over time, will increase student comprehension.
Response Bookmark- This is a variation of the Reciprocal Teaching idea. With this, I use for shorter articles or texts and after students understand the process.
Friday, October 5, 2012
Price is Right Game
Once the school year sets in and we get into our routines, I like to start rewarding students for doing their job. I wanted to use a checkbook system, but wanted to make it very manageable for me, as well as engaging for the students. Additionally, I wanted to practice adding and subtracting of decimals, estimation, and money management. From there, the Price is Right was created.
 At the beginning of the game, I give each student a ziplock baggie (I have used envelopes in the past). Inside the ziplock bag, I give each student a Bank Account Register. This register is where they keep track of all their transactions throughout the game (we update at the end of each day, so kids aren't pulling their wallet out during instructional times).
To begin, I give each student an "allowance". We record the money down together in the Bank Account Register so students get the idea of how it's done. Then, we go through the PowerPoint of game directions. We brainstorm together ways to gain money and ways to lose money. I keep this posted in the room throughout the duration of the game.
During the game, I have money cut and ready to hand out. When I give students money, I have them write their name on the back of the money and put it away in their wallet (ziplock bag) until the end of the day. If I need to take money from students, I have them get it out at that moment. Then, I cross of their name on the back of the money, put my initials on it, and re-use the money.
Now, what do kids do with the money? This ranges from extra recess, Silent Auctions, Showcase Showdown, to spinning the wheel (see link below). When we do a Silent Auction, I place items around the room and kids have to manage their money and also place bids on items they would like. For the Showcase Showdown, I find pictures of items online and put it up on the Smartboard. I have two kids play each other at a time, they have to guess the price of the item. The person who guesses the closest amount moves on to the next round. For the "Wheel", kids pay money to come up and try to spin the wheel. We play 3 kids at a time, with the person getting closest to a $1.00 receiving a prize. This year, I'm going to brainstorm some other possible prizes/rewards with the class!
We usually play this game for about 1-2 months. It's a great way to build motivation, reward students, and have students practice using money and money management.
"The Wheel" Link: http://www.mazeguy.net/bigwheel.html#
Thursday, October 4, 2012
Stoplight Activity
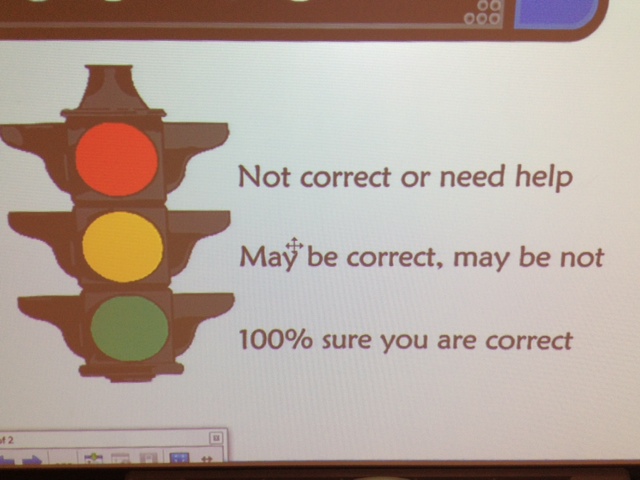 Today, my 5th graders reviewed for a math test. Not only did I want them to review for the test, but I wanted each of them to start advocating for themselves and any problems they don't understand. I found this Stoplight Activity online and thought it would work well for both purposes.
I gave the class 20 minutes to work independently on the review. When they finished a problem, they marked the number with either a red, yellow, or green crayon. When I explained this, I used a picture of a stoplight to explain directions.

RED- STOP! I need help OR I am not correct with my work/answer.
YELLOW- SLOW DOWN! I need help or I am partially right with my work/answer.
GREEN- GO! I can help others or I am confident I am 100% correct with my work/answer.
Then, after the 20 minutes, students pair up and start working through all the "red problems" together. After, they move to "yellow" and then "green".
Character Traits and Evidence
For the past month, my 5th graders have been working on character. My teaching partner and I wanted to take character to a higher level, rather than just explaining the main character.
I'll outline what we did for the unit:


I'll outline what we did for the unit:


- Define what a character is- we used the terms "antagonist" and "protagonist". To help kids remember, we said that "antagonist" starts with ants... and ants are bad to have in the house!
- We gave students a "Character Traits" sheet. We read a story together (you can use any story) and started using the traits to describe the characters. We created an anchor chart to display.
- The next day, we re-read the same story. During our reading, we referred back to our anchor chart to see if we still agreed with each trait. When we finished reading, we looked at each trait and started to eliminate the traits that were only shown in one section of the book (I wanted the kids to use traits that were more long-lasting).
- I did a mini-lesson on how an author develops a character. We used the terms "round" and "flat" character.
- Then, we looked at how character traits can be positive, negative, or neutral. I gave the kids a "Character Traits Sorting Cards Game" (thanks, Laura Candler!). I put the students into groups- they had to have a discussion about each word to decide if the trait is positive, negative, or neutral. This went really well, as kids were starting to realize that a trait can be seen either way, all depending on the context of the story. This took a couple days.
- We learned that an author uses 3 ways to leave "clues" for the reader to figure out the traits of a character- action clues, verbal clues, and other clues (thanks, Laura Candler!). Together, we read a short story and started to look for ways that the author left clues- and labeled them action, verbal, or other. The kids catch on pretty quickly about this. Additionally, it makes kids start to learn how to gather evidence.
- From here, I introduced the graphic organizer that we started to use with our small group books. We use the graphic organizer ongoing throughout the remainder of the year. For my higher ability groups, I have them use this to document character change throughout a text. Additionally, they start to look at how setting impacts a character and his/her change.
- When I teach this unit, I teach it in September. To add some creativity to the character traits, the kids make a Halloween character (using their real picture as the face). Then, they write a short paragraph describing their character using 3 traits and evidence. They have fun creating the Halloween character using higher-level traits and made up evidence.
 Then, I introduce the kids to providing evidence using "Evidence-Based Terms". I found this idea online and love it. We practiced with a short book. We wrote out traits first. Then, we went back through and used the "evidence-based terms" to add our evidence to the trait itself. This is nice because it takes everyday, common words and shows kids how to use them to go further with their ideas by providing evidence, much like a detective does.
- Now, we are starting to use the traits and evidence in whole and small group. I think this is setting the stage for our next unit, "inferring".

Subscribe to:
Posts (Atom)